If everything you’ve done and created since your business was born disappeared, do you think it would survive? What about even just the past year? Your client and project information, emails, records, financial data, content – poof! It’s a scary scenario that unfortunately happens to organizations every day due to cyber threats, data breaches, theft, and natural disasters. Smart companies know that having a disaster recovery plan, before they need it, is the best way to ensure their business is always safe.
Here we’ll go over everything you need to know about disaster recovery. What it is, how it works, why it’s important, and how to go about creating your own disaster recovery plan.
And if you think you could use some extra help, check out our BDR and continuity services!
WHAT IS DISASTER RECOVERY AND HOW DOES IT WORK?
Disaster recovery is just what it sounds like – creating a detailed, thorough plan for your organization to recover and get back to business in the event of an emergency. This can be anything from a natural disaster like a fire or flood, to a ransomware attack that holds all of your company’s data hostage until you pay the perpetrators.
Disaster recovery plans are far more involved than many business owners may expect. It’s not simply “if something happens, we’ll all go home until IT fixes the problem”. Plans need to go over crucial business applications, time to recovery targets, how much past work the business can live without (if any), who is responsible for what steps, how long your business can afford to be down, and much more.
The major goals of a disaster recovery plan are to avoid confusion and frustration when an emergency happens and to get you back to business as quickly as possible with minimal losses.
WHY IS DISASTER RECOVERY IMPORTANT FOR BUSINESSES?
An unexpected disaster is nearly inevitable for the modern business. Fires, floods, hurricanes, tornadoes, severe storms, and earthquakes are common throughout the country. Businesses may carry insurance for these, but insurance will do nothing to get your business operational again.
In addition to Mother Nature, companies also have to worry about cyber attacks, data breaches, malware, theft, disgruntled employees, and a host of other threats. It’s enough to cause any business owner to lose sleep!
Without a plan to handle an emergency, it can be absolute chaos when one hits and result in lost time, money, customers, and data. A lack of preparation is the root cause of business’ troubles (and hope definitely doesn’t count as an effective plan).
So of course, the easy solution is to prepare! Having a disaster recovery plan that accounts for any situation will help ease your fears and ensure no emergency ever destroys your business.
Who is responsible for the disaster recovery plan?
Most often, the plan is created in conjunction with multiple team members and vendors. The business owner(s) and executive team will need to be involved, along with IT, any critical vendors, and stakeholders.
WHAT DOES A DISASTER RECOVERY PLAN CONSIST OF?
Most disaster recovery plans will typically include these elements (DeVry University via Course Hero):
- The name of the decision-making manager who is in charge of the disaster recovery operation. A second manager should be indicated in case the first manager is unavailable.
- Staff assignments and responsibilities during the disaster.
- A pre-established list of priorities that states what is to be fixed first.
- Location of alternative facilities operated by the company or a professional disaster recovery firm and procedures for switching operations to those facilities using backups of data and software.
- Recovery procedures for the data communication facilities (WAN, MAN, BN, and LAN), servers and application systems. This includes information, and the support that can be expected from vendors, along with the name and telephone number of the person to contact.
- Actions to be taken in case of partial damage, threats such as a bomb threat, fire, water or electrical damage, sabotage, civil disorders, or vendor failures.
- Manual processes to be used until the network is functional.
- Procedures to ensure adequate updating and testing of the disaster recovery plan where they cannot be destroyed by a catastrophe. This area must be accessible, however, to those who need to use the plan.
HOW TO CREATE YOUR DISASTER RECOVERY PLAN, STEP BY STEP
1) Audit your inventory and data needs
Before you can begin crafting your plan, you’ll need to know what you’re working with. Creating an inventory of your computers, laptops, software, wireless devices, servers, and applications will help to ensure that nothing is forgotten.
Take special note of your business-critical applications and the hardware they run on. You should ensure that copies of all necessary software are available and organized for re-installation purposes. The last thing you want in a disaster recovery situation is important time wasted trying to hunt down where everything is.
At this time, it’s also a good idea to get at least a general idea of how much data will need to be backed up. Audit and catalog how much data is currently stored on all your computers, devices, servers, any existing backups, and hard copy records that you’d like digitally saved. As you search for the best storage medium for your needs, figuring out how much space you require and what you can expect to spend to house it is helpful. And don’t forget to budget for increasing space as your data grows.
2) Figure out your Recovery Time Objective (RTO) and Recovery Point Objective (RPO)
These two items will help determine how you craft the rest of your plan.
Recovery time objective refers to the time between when disaster strikes and when your team can work again. This can be in minutes, hours, or days and will vary for each business. A few factors will go into this number:
- How much money would be lost for every minute/hour/day your business is down? How long until that number becomes unacceptable?
- What are your critical applications/databases? What are the minimum requirements for necessary business to be conducted? If your company can operate well enough with only email, your phone systems, and QuickBooks, then your RTO number should be how long until those systems can be made operational again. But if you absolutely need access to your server and multiple applications to work, you’ll need to figure out how long it would take in various disaster situations to get those up again to calculate your RTO.
- What are the realistic times that integral programs can be up and running again? You may like for your systems to be online again within five minutes, but often that’s not possible. You’ll need to work with your IT department and vendors to figure out the minimum recovery time for different programs and data and work those into your recovery time objective for various software, hardware, and files.
Once you have the above data, you may choose to create one baseline RTO that only accounts for the most integral systems required to conduct business, or multiple RTOs that cover everything needed to make you 100% operational again.
Recovery point objective refers to the amount of data that’s acceptable to lose in a recovery situation, aka what your recovery point will be. If you suddenly had an emergency today, could you resume normal operations without everything done in the past day? Or is new information and work constantly being done that’s integral to business? If so, you’ll want to have a short recovery point objective, for example 30 minutes. If your business doesn’t create very much new, important information each day then you can get away with a longer RPO, maybe one day or even one week.
RPO decides how often backups will need to be completed. If your recovery point objective is settled at one hour, then you’ll need to create backups every hour so that in an emergency situation you’ll only lose one hour of work.
Keep in mind that the lower your RTO and RPO numbers, the more expensive your recovery costs will be. If you need to be back up and running very quickly with minimal data loss, and have a lot of files and applications, you’ll need the technology to support that. It isn’t cheap. But for many businesses, it’s worth the investment. The risk of their organization being completely down for multiple days, weeks, or even months is too great.
Obviously, this is very personal to each company. The potential downtime versus the costs to maintain your disaster recovery plan will need to be weighed and an acceptable balance reached.
3) Create or update your backup systems
Once you’ve found your RTO, RPO, storage requirements, and recovery goals, you’ll need to ensure your technology supports them.
On-site versus off-site backup
We always recommend using both an on-site and off-site backup solution. An on-site backup that lives within your business will allow for fast recovery and high availability that doesn’t require an internet connection. Examples of common on-site backup solutions are tape drives, hard drives, CDs, or flash drives.
Off-site backup, typically done through a cloud backup service, ensures that if your on-site backup fails or is unavailable you’ll still have your data safe and ready to recover. It works as a backup to your backup! Think services like Dropbox, Google Drive, Microsoft OneDrive, and iCloud that are available from anywhere on any device.
If you can’t do both, we suggest deferring to an off-site solution. Many times in a disaster the on-site backup will not work for recovery. For example, if your office is flooded or the building burns down, your on-site backup will be destroyed. If your company falls victim to malware or a cyberattack, often the backup will be corrupted as well since it’s part of your network. Off-site backup will protect against situations like this. It’s a completely crushing situation when a business has faithfully ensured their on-site backup system has worked perfectly for years, and then suddenly everything on it is wiped out and all your company has created is gone.
Off-site backup solutions are generally more expensive than on-site as off-site depends on paying a monthly or yearly recurring charge dependent on the amount of data you’re backing up. This is often why companies choose to rely on on-site.
However, the risk must be weighed. If your in-house backup is destroyed or corrupted and can’t be used in recovery, the money you saved was for nothing. You may choose to gamble and hope that your on-site backup will be available for recovery needs. Just keep these risks in mind when deciding what you’ll do.
Some companies also don’t have a strong or reliable internet connection, such as in rural areas. In this case, you may be forced to choose an on-site backup as reliable off-site backup and recovery depends on a good internet connection. If you must go with on-site only, we recommend doing everything possible to keep it safe. Consider housing your backup in a separate location overnight, and operating it on a separate, secluded network from the rest of your business if possible.
Choosing a backup medium

Hard drive (HDD)
Pros: Cheap, easy to find, variable storage sizes
Cons: Will fail eventually, can be lost/damaged/destroyed/stolen, slower and more power-hungry than other options
Hard drives have been around for quite a while, and most are familiar with them by now. They remain the cheapest + most generous physical backup option currently. You can easily buy a 1 TB or larger hard drive for around $100 or less. You always want to make sure your backup medium has more storage space than what you are trying to back up, with some leftover room as you add more down the line.
The downside to hard drives is that they’re still doomed to fail at some point – all hard drives have physical, moving parts that will wear down and fail over time. They’re also comparatively slow and consume more power than flash drives or solid-state drives.

Solid-state drive (SSD) or flash drive (aka thumb drive, USB drive/stick)
Pros: Fast, high performance, easy to find
Cons: Expensive, better intended for performance versus storage, flash drives are very easy to break or lose
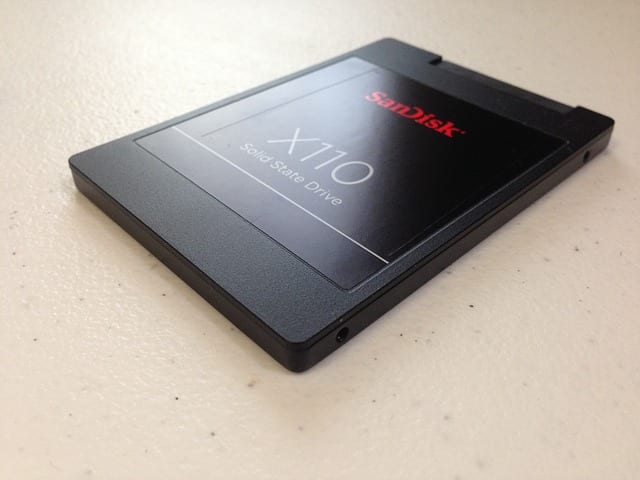
Flash drives and SSDs are the most efficient physical way to backup your system. Flash drives and solid-state drives use flash technology to write and read data very quickly, making for speedy backups. Solid-state drives also store data more efficiently, so you don’t need quite as much space on an SSD as opposed to an HDD.
However, these two technologies are not really designed to be storage mediums. Solid-state drives are better suited for uses where quick performance is a big factor, such as in gaming or loading your operating system.
Flash drives are notoriously easy to break (or lose) and are mainly used for transporting data from one place to another efficiently. We have heard many tales of USB drives left in a laptop, accidentally getting knocked against a wall or table, and the drive broken and your data gone.
While the price has dropped in recent years, flash and solid-state drives are also far more expensive when compared to hard drives of the same size.

CD-ROM & DVD-ROM
Pros: Cheap, easy to find and use, simple to store
Cons: Dying medium, limited storage capacity, easy to damage, and limited life
Most people are very familiar with CD/DVDs by now, and programs for writing to CD/DVDs are already built into most operating systems. They are easy to use and find, and are a simple way to back up your computer. However, storage capacity is obviously limited, and backing up this way is better suited to those with a small amount of data. CDs have a 700 MB capacity, and DVDs have either 4.7 GB or 8.5 GBs to use.
CDs and DVDs are also unfortunately a dying medium. You may have noticed if you have shopped for a new laptop or notebook lately that some models didn’t even have an optical/CD drive. Many big companies like Apple and Microsoft are slowly moving away from software discs, as it is cheaper and easier to distribute and download programs over the internet. So needing an optical drive to load your files on a new computer could limit your choices down the road.
CDs and DVDs also simply don’t last very long. If you are using optical media to store your files, be sure to keep the following tips in mind:
- Use high quality, “archival quality” discs
- Use a jewel box instead of a paper/plastic sleeve to store them
- Keep your discs clean, hold them by the edges and wipe fingerprints off with a clean, soft cloth
- Store them in a dark, dry, cool place
- Mark your discs with a non-solvent based felt-tip marker
- Write discs at a slow speed to better ensure write integrity and minimize rewrites

Tape drive
Pros: Cost-effective for large amounts of data, long-lasting, scalable, portable, not susceptible to power surge corruption
Cons: Slow to backup and recover data, questionable dependability, high hardware costs, risk of corrupting data while moving tapes, high management requirements
Tapes have been popular as a backup method for decades. The data on them can be compressed allowing for more storage space per tape. They can be stored for up to 30 years which is good for companies that need to archive data for a long time. They’re also cheaper than many other storage mediums; the converse is that the hardware required to write and read data to them can get expensive. They’re also very easy to move to another location, take off-site, or ship if necessary.
While a lot of companies do still use tape backup, there are some big disadvantages to consider. Their portability is great, but there is a significant risk of corrupting the data on them in the process. Likewise, they’re also very easy to steal.
Tapes require a decent amount of attention – someone needs to remember to change them out regularly, replace them annually, and take them off-site for security. The biggest con we feel is their read and write speed, which refers to how quickly data can be put onto and retrieved from the tapes. It’s slower than the other mediums here, which requires much more time and management from whoever is responsible for them. If you do end up in a recovery situation, it will be a longer process to get back up and running. It can take hours just to restore data to one employee’s computer.

Cloud service
Pros: Always available and working, data can’t be accidentally destroyed or damaged, can access data anywhere from any device, very secure
Cons: Backup can take a while depending on your internet speeds, requires an internet connection, recurring costs
Cloud storage is the latest and greatest trend for storage and data access. Obviously, the pros are valuable: your data is always there and accessible from any internet-connected device, and it’s darn near impossible to lose, destroy, or damage cloud-stored files. As long as you are connected to the internet your cloud backup is always on and present, making it great for doing incremental backups. Many of these programs are automatic, so once you set them up the software will scan your computer for changes and back them up without you having to do anything.
There are a few drawbacks though. The speed you can perform a backup at largely depends on your internet speed, so over a slow connection it could take hours or even days to back up and restore all of your data.
Most cloud storage services also only allot a small amount for free, typically a few gigabytes. After that, you’ll be paying a monthly or yearly storage fee based on the amount of data you need saved. It’s pretty much guaranteed that a business will need to pay for cloud storage.
Cloud storage is gaining momentum, however, so there are lots of services around now with very reasonable fees. And when you compare these to the hundreds you might spend on physical storage mediums, and the ever-present possibility that those physical storage mediums may fail or need recovery, monthly/yearly storage fees don’t look so bad.
Types of backup methods
Full backup
This is just what it sounds like, a full and complete backup of all the files and folders that you decide to include. It clones all data, including anything that has already been backup up previously.
The downside to this method is that it’s time-consuming and takes up a lot of space. Every time you back up you’re including everything, not just any new data that’s been added since the last time. This also causes a longer recovery time.
Full backups are best used for initial backup, and periodic backups thereafter when you want to be sure all your data is saved – perhaps semi-annually or yearly.
Incremental backup
This will only backup what has changed since the last backup. This makes baking up quicker and less storage-intensive. They will often be the regular backup method of choice for most businesses and supplemented with periodic full backups.
The negative aspect of incremental backups is that they can cause a longer restoration time. The data needs to mesh together with the other incremental backups and full backups, which can be a more intricate process.
Differential backup
This method falls in the middle of a full and incremental backup. It’s similar to an incremental backup in that it records all the changes made since the last backup, but it looks at changes since the last full backup as opposed to the last incremental backup.
It takes more time to complete than an incremental backup, but less than a full backup. It also requires less space than a full backup and is quicker to restore than incremental.
Mirror backup
A mirror backup is nearly the same thing as a full backup. The difference is that a full backup compresses and stores all your data within one file. A mirror backup copies all your files and folders without compression and stores them separately. Hence the name – it creates a “mirror” of your current data.
A mirror backup is the fastest method to both backup and restore the data. The drawbacks are that it requires a lot of storage space and can’t be password protected.
Our recommendation: The best bet for many companies is a combination of hard drives for full backup and archiving purposes, and cloud storage for incremental backups to help speed up the backup and recovery process.
4) Create your disaster recovery game plan
Once you’ve decided on how you’ll store your data, backed everything up, and figured out your acceptable RTO and RPO, it’s time to make a game plan for your recovery scenarios.
Your IT team should be very involved in this process, as it’s really not something anyone without IT knowledge would be able to handle alone. You’ll need to know how long it will take to recover your necessary programs and data, the actual process and work needed to restore everything, how to combat and recover from cybersecurity incidents that could cause a disaster scenario, and many other technical details.
In addition to your IT team, you’ll want to think of anyone who’ll have a part in recovering from and responding to a disaster and make sure they’re included. This could be whoever handles your finances, your legal help (especially if you have industry compliance requirements), your public relations team, your executives, etc. Everyone should advise on how an incident would affect them, and know what their role is when something happens.
In your game plan, be as detailed as possible in describing what should happen from the moment the incident occurs, to when everything is back to normal. Think both short- and long-term here. We talked earlier about figuring out the bare requirements for running your business. Use this as your short-term recovery goal and outline everything that needs to happen to get to that point. Getting to an acceptable level of operations is your first goal in any scenario. Then, go into the requirements for getting back to normal operations. 100% recovery is the objective, but it’s more important to at least be able to conduct basic business until you can get there as 100% will usually take much longer to achieve.
Some scenarios may have different steps than others, so it’s important to account for any situation. If your building burns down, the recovery process will be much different than for a ransomware attack.
Once your plan is complete, include the rest of your team. You don’t want them confused, worried, or even unintentionally causing more damage in a disaster because they don’t know what to do. While they don’t need to know every detail of your recovery plan, they should know what’s expected of them in various situations.
5) Test and update your disaster recovery plan periodically
Arguably the most important part of any disaster recovery plan is to test it before you need it! During a disaster is not the ideal time to find out that part of your plan isn’t effective.
We recommend doing at least an annual test. If you’re working with an IT or managed service provider, they can and should handle this for you. If you’re testing for different scenarios, you may want to space the tests out over a period to keep things manageable.
Once you’ve run through the test, update your plan accordingly. Was there anything that didn’t work as well as you thought? Any steps that were unnecessary or things you forgot? The more thorough you can be now, the smoother things will run when you actually need to recover.


